บทที่ 8 การจำลอง vector
เริ่มจากไปที่ ArcGIS > PASAK
> สร้างโฟลเดอร์ว่า dam_ชื่อ

ArcGIS > PASAK >> results คลิกและลากชั้นข้อมูล a5138i
, a5238iii , a5238iv , a5239iii ออกมาวางใน Display Area


จะมีหน้าต่าง Merge > Input Datasets : เลือกทั้ง 4 ชั้นข้อมูล > Output Datasets : ตั้งชื่อ admin
>
Save > OK

จะได้ดังนี้

คลิกขวาที่ admin > Open Attribute Table ข้อมูลในตารางจะเพิ่มขึ้นดังรูป

นำเข้าชั้นข้อมูล luprv คลิกขวาที่ luprv=> Open จะปรากฏหน้าต่าง
Table และเปิดตารางของ admin

เทียบตารางของ luprv กับ admin ความสัมพันธ์เป็นแบบ
1 ต่อ 1 คลิกที่ Table Options
> Joins and Relates > Join

จะปรากฏหน้าต่าง Join Data > 1. Choose the field in this layer that the join will
be based on : PRV_ID > OK

นำเข้าชั้นข้อมูล luamp คลิกขวาที่ luamp > Open จะปรากฏหน้าต่าง Tableและเปิดตารางของ admin จะปรากฏดังรูป

เทียบตารางของ luamp กับ admin ความสัมพันธ์เป็นแบบ
1 ต่อ 1 คลิกที่ Table Options
> Joins and Relates > Join

จะปรากฏหน้าต่าง Join Data > 1. Choose the field in this layer that the join will
be based on : AMP_ID > OK

ข้อมูลในตารางจะเพิ่ม AMP_NAME ใน admin ดังรูป

คลิกและลากชั้นข้อมูล dam เข้ามาวางใน Display Area ดังรูป

คลิกที่ Geoprocessing > Buffer จะปรากฏหน้าต่าง Buffer > Input Features : dam > Output
Features Class : ตั้งชื่อ Dam500 > Linear unit : 500
> Meters > OK

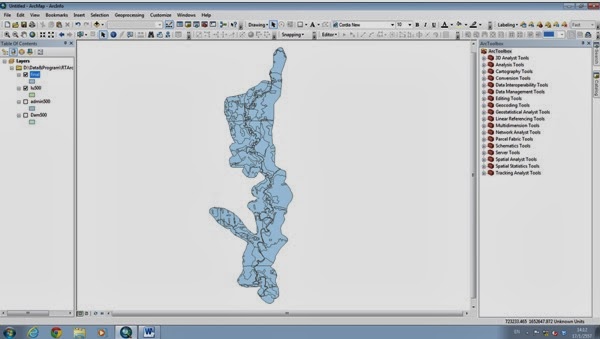
เสร็จแล้วจะได้ดังนี้

คลิกที่ Geoprocessing > Clip จะปรากฏหน้าต่าง Clip
=> Input Features : admin > Clip Features : dam500 > Output Feature
Class : ตั้งชื่อ Admin500 >Save > OK

เสร็จแล้วจะได้ดังนี้

คลิกที่ Geoprocessing > Merge จะปรากฏหน้าต่าง Merge>
Input Datasets : เลือกทั้ง 4 ชั้นข้อมูล > Output Datasets : ตั้งชื่อ LU
> Save > OK

เสร็จแล้วจะได้ดังนี้

เปิดโฟลเดอร์ที่ชื่อว่า Code มีรายละเอียดดังนี้
luamp = รายละเอียดเกี่ยวกับอำเภอ
lucode
= รายละเอียดเกี่ยวกับการใช้ที่ดิน luprv
= รายละเอียดเกี่ยวกับจังหวัด lutam
= รายละเอียดเกี่ยวกับตำบล

นำเข้าชั้นข้อมูล lucode คลิกขวาที่ lucode=> Open จะปรากฏหน้าต่าง Table และเปิดตารางของ LUจะปรากฏดังรูป
จะปรากฏหน้าต่าง Join Data > 1. Choose the field in this layer that the join will
be based on : FLUCODE > 2.Choose the table to join to this layer , or load
the table from disk : lucode > 3.Choose the field in the table to base the
join on : FLUCODE > OK >YES

เทียบตารางของ lucode กับ LUความสัมพันธ์เป็นแบบ
1 ต่อ 1 คลิกขวาที่ LU >
Joins and Relates > Join

คลิกที่ Geoprocessing > Clip จะปรากฏหน้าต่าง Clip
> Input Features : LU > Clip Features : dam500 > Output Feature Class
: ตั้งชื่อ LU500 >Save > OK

เสร็จแล้วจะได้ดังนี้

คลิกที่ Geoprocessing > Union จะปรากฏหน้าต่าง Union
> Input Features :LU500 กับ Admin500 > Output
Feature Class : ตั้งชื่อ Final > Save > OK

เสร็จแล้วจะได้ดังนี้
คลิกขวาที่ Final > Open Attribute Table คลิกที่ >>Table Option
> Add Field จะปรากฏหน้าต่าง Add Field >>>ช่อง Name : Area >Type : Float >Precision : 20 > Scale
: 2 > OK

คลิกหัวข้างบนตรง LU_AREA ให้เป็นสีฟ้าทั้ง หลัก แล้วกด Ctrl บนคีย์บอด แล้วไปคลิกที่ admin_AREA
ให้เป็นสีฟ้าทั้ง หลัก แล้วไปคลิกขวาที่ AREA ที่สร้างฟิลด์ใหม่
เลือก Calculate Geometry =>Yesจะปรากฏหน้าต่าง Calculate
Geometry กด OK จะปรากฏดังรูป

เสร็จแล้วจะได้ดังนี้

คลิกที่ Start > All Programs > Microsoft Office > Microsoft
Excel >เปิดไฟล์ที่เซฟไว้ว่า
Final.dbf ถ้าหากหาไม่เจอให้คลิกเป็น All File =>
OK

เสร็จแล้วจะได้ดังนี้

ไม่มีความคิดเห็น:
แสดงความคิดเห็น